ok here is a bunch of posts that go through a step by step of how I start a friction fire.
The process of starting a friction fire starts well before you ever start rubbing sticks together. When I walk in
the woods I am taking note of materials around me that I could use to start a fire. Most of the time I'm just
passively taking note of things, like standing deadwood, tinder sources, conifers (because they are soft wood), bone
white dead wood (because that is often tulip poplar and good for friction fire). Once I decide I am going to make a
friction fire I start actively looking for 3 main things. Tinder, a straight piece of softwood for the drill, and a
softwood board that I can make a fireboard out of.
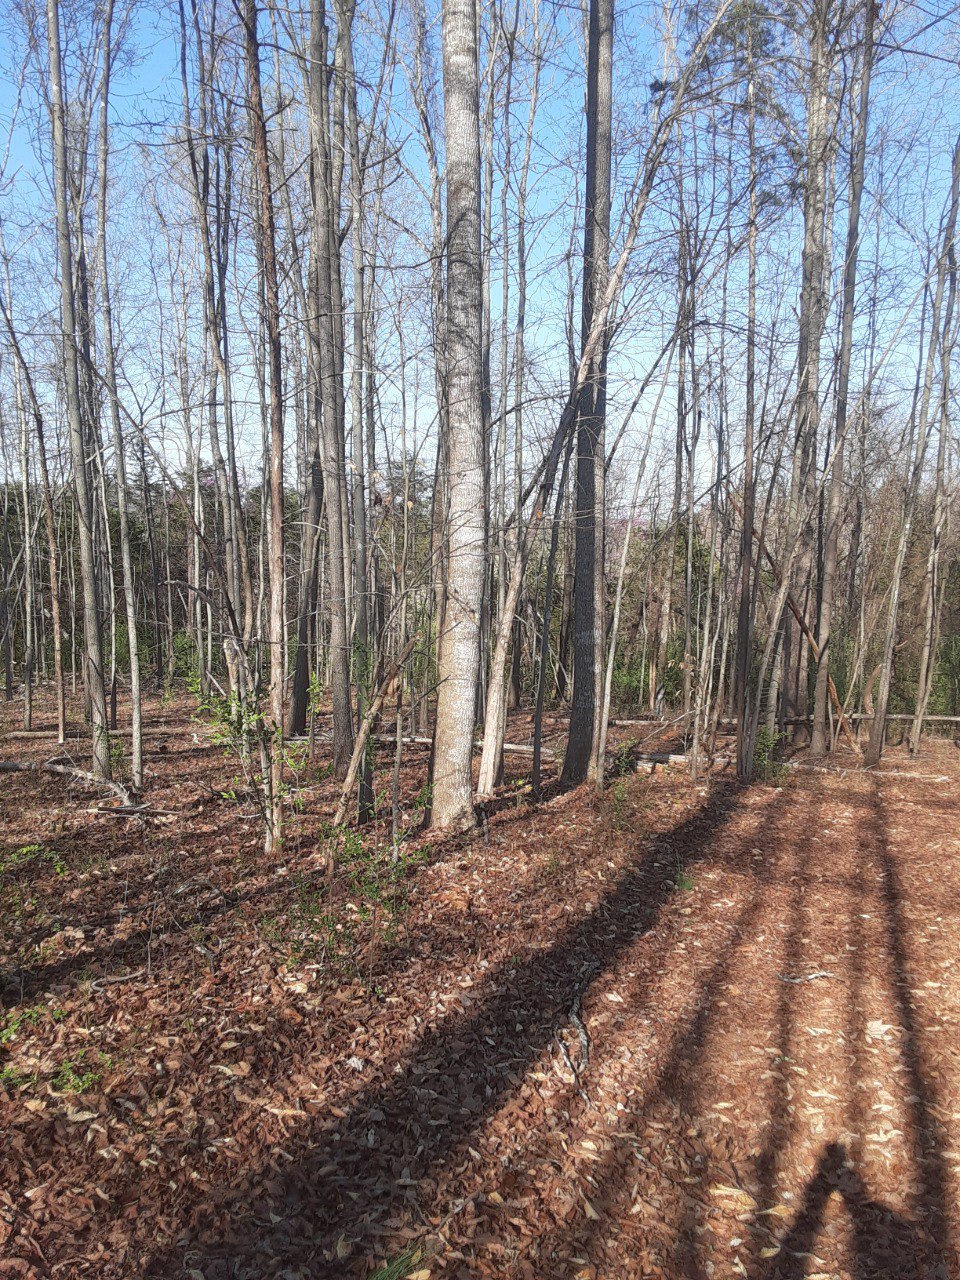
In this first picture I can see conifers in the distance. I'll look there for standing
deadwood that I can use for all 3 of the key things I need. Fireboard, drill and tinder.
The trees are eastern red cedars. I don't need to know the name of the tree though, I just
need to know if it has the proper characteristics. Is it soft enough where I can press my thumbnail into it. I
haven't tried a conifer tree yet that wasn't good at friction fire. Cedar will provide me with all three of my
key items. Cedar is a great wood for friction fire. It also provides us tinder.
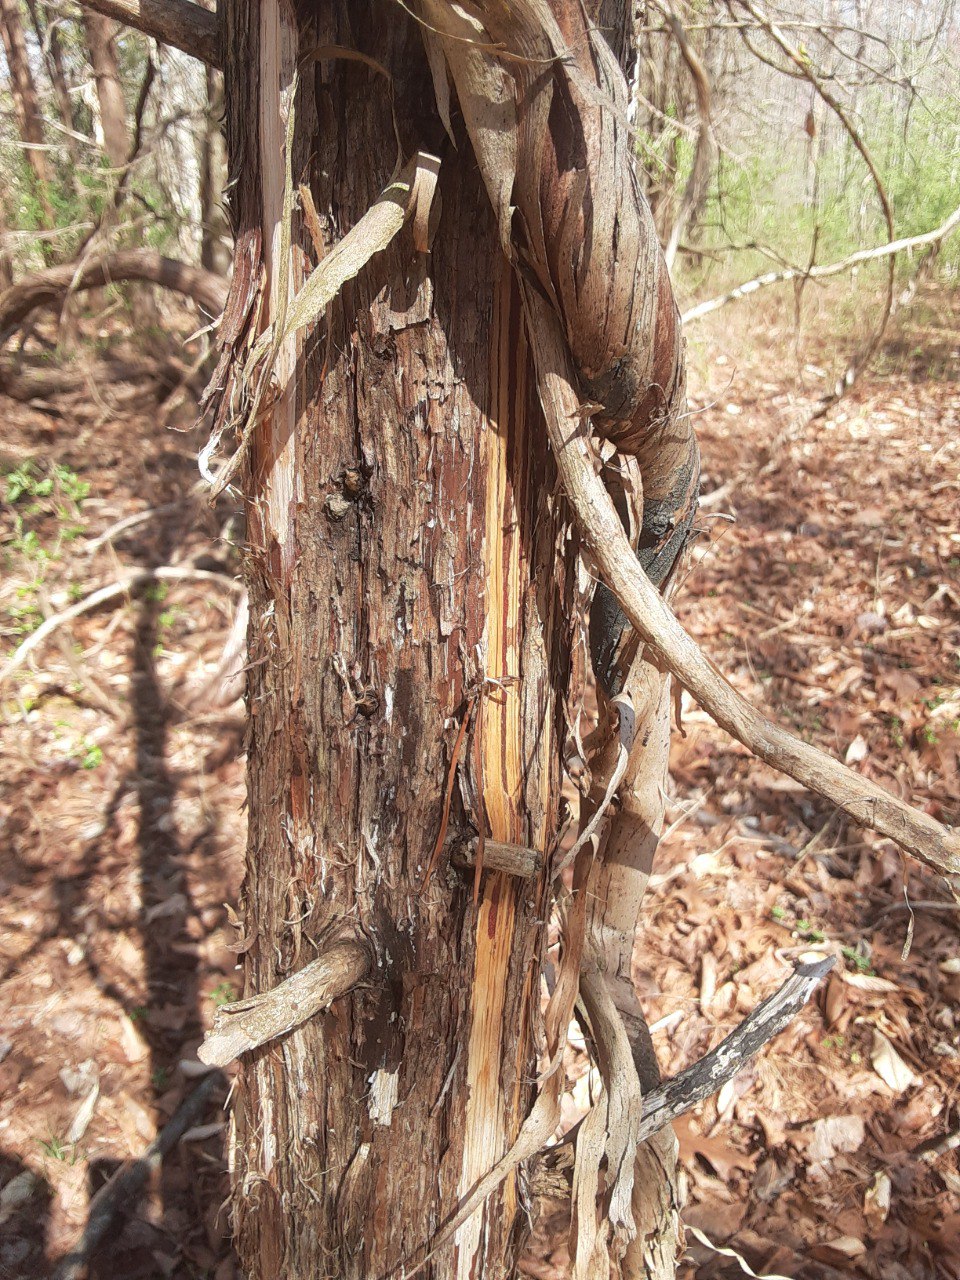
First I harvest tinder by peeling away the bark. This tree is standing deadwood. Standing
deadwood is usually much drier than wood laying on the ground.
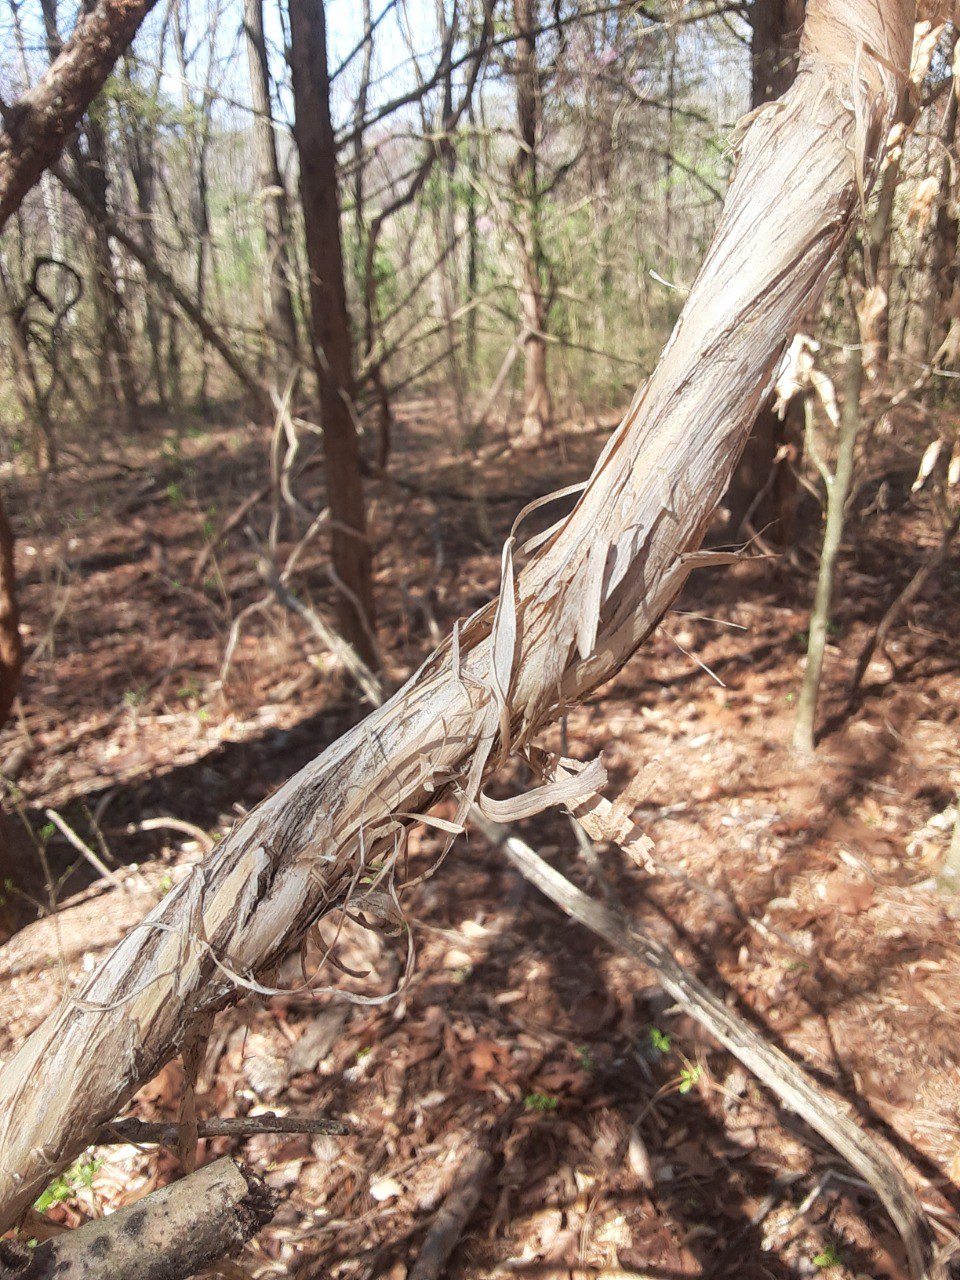
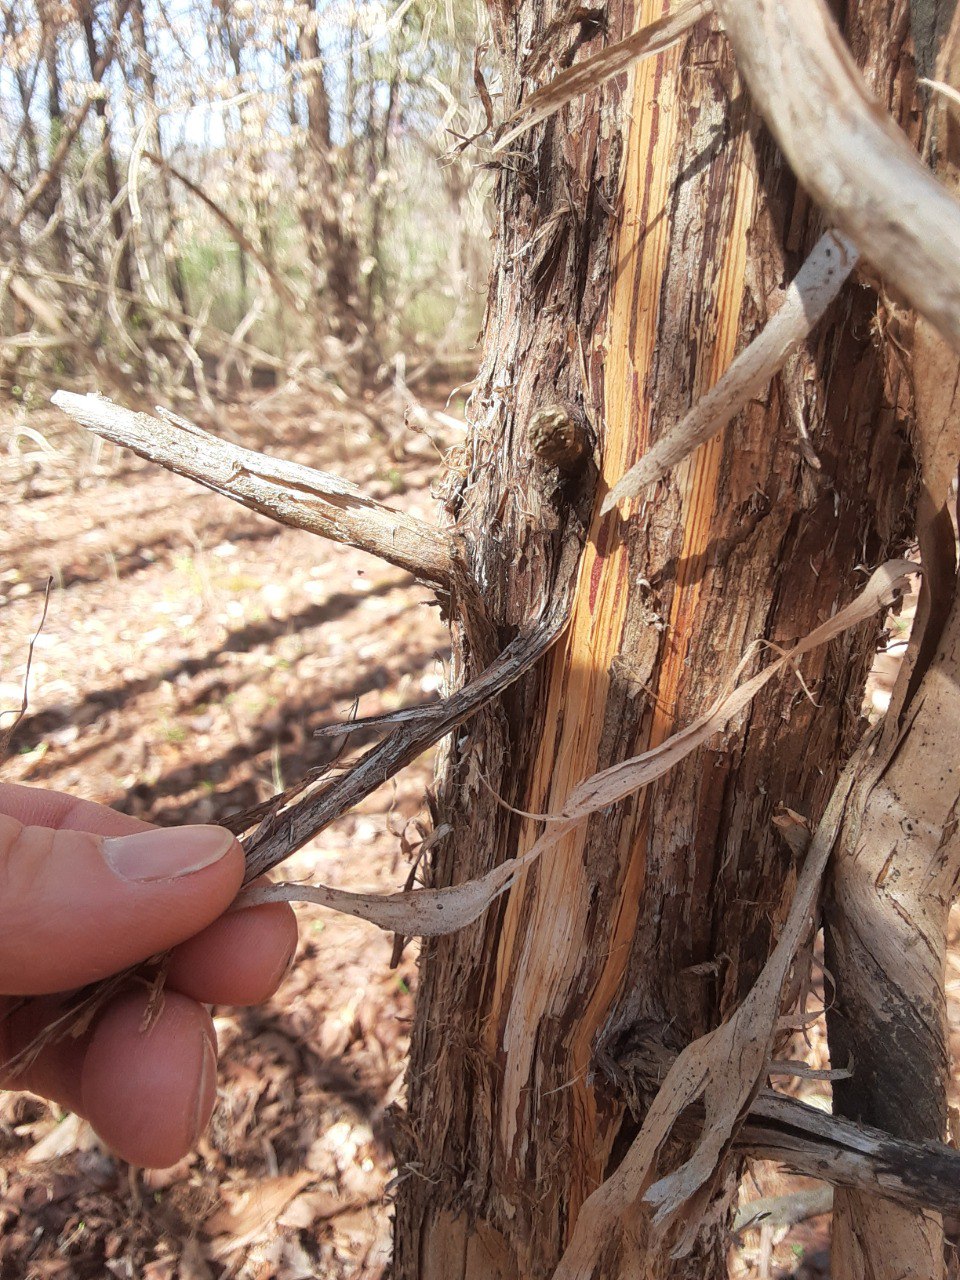
Here is a vine growing in the cedar with a nice papery bark. This will also be great for a
tinder bundle.
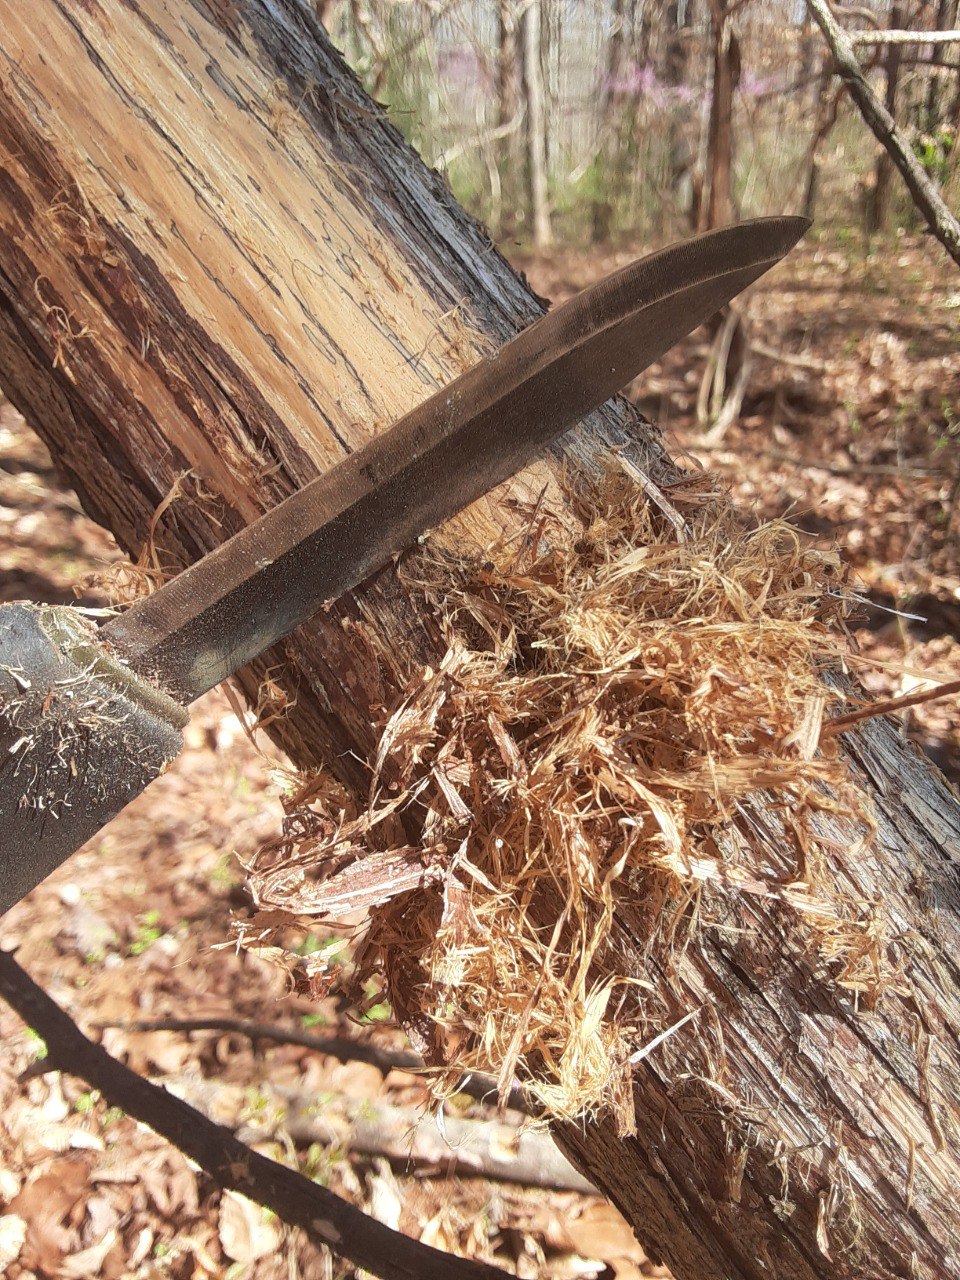
Also scraping a dead cedar with the back of my knife produces a fine fluffy tinder. I'll put
this in the center of my "bird's nest" of tinder.
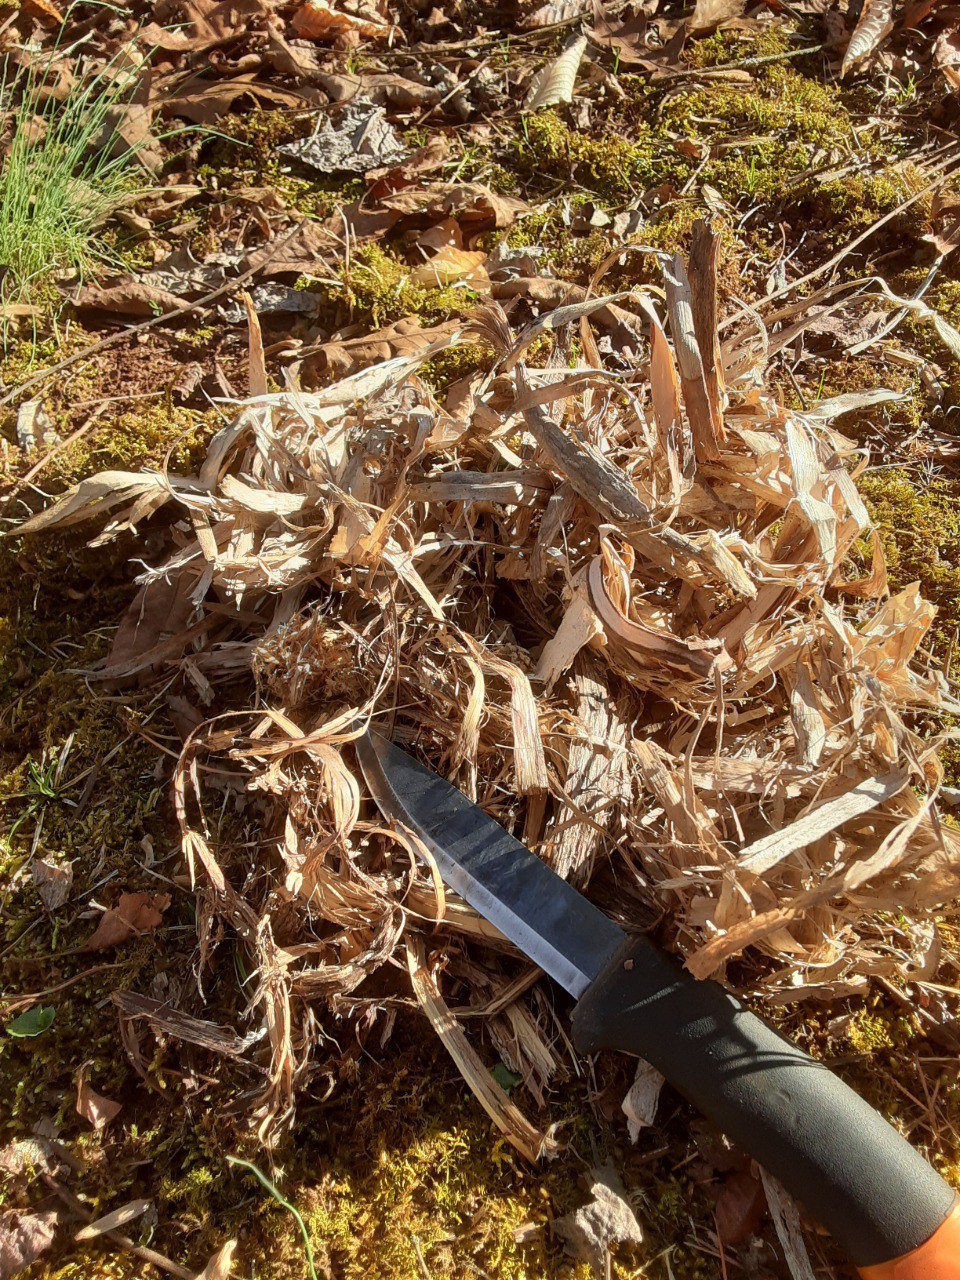
Here is the material I've harvested for the bird's nest.

Next I process this material to increase it's surface area, by pulling the strands apart and
rolling it in my hands to break it into a finer fluff. Then I form it into a bird's nest and put the finest
fluff in the center. My burning ember will be placed here. Now it's time to move on to making the bowdrill set.
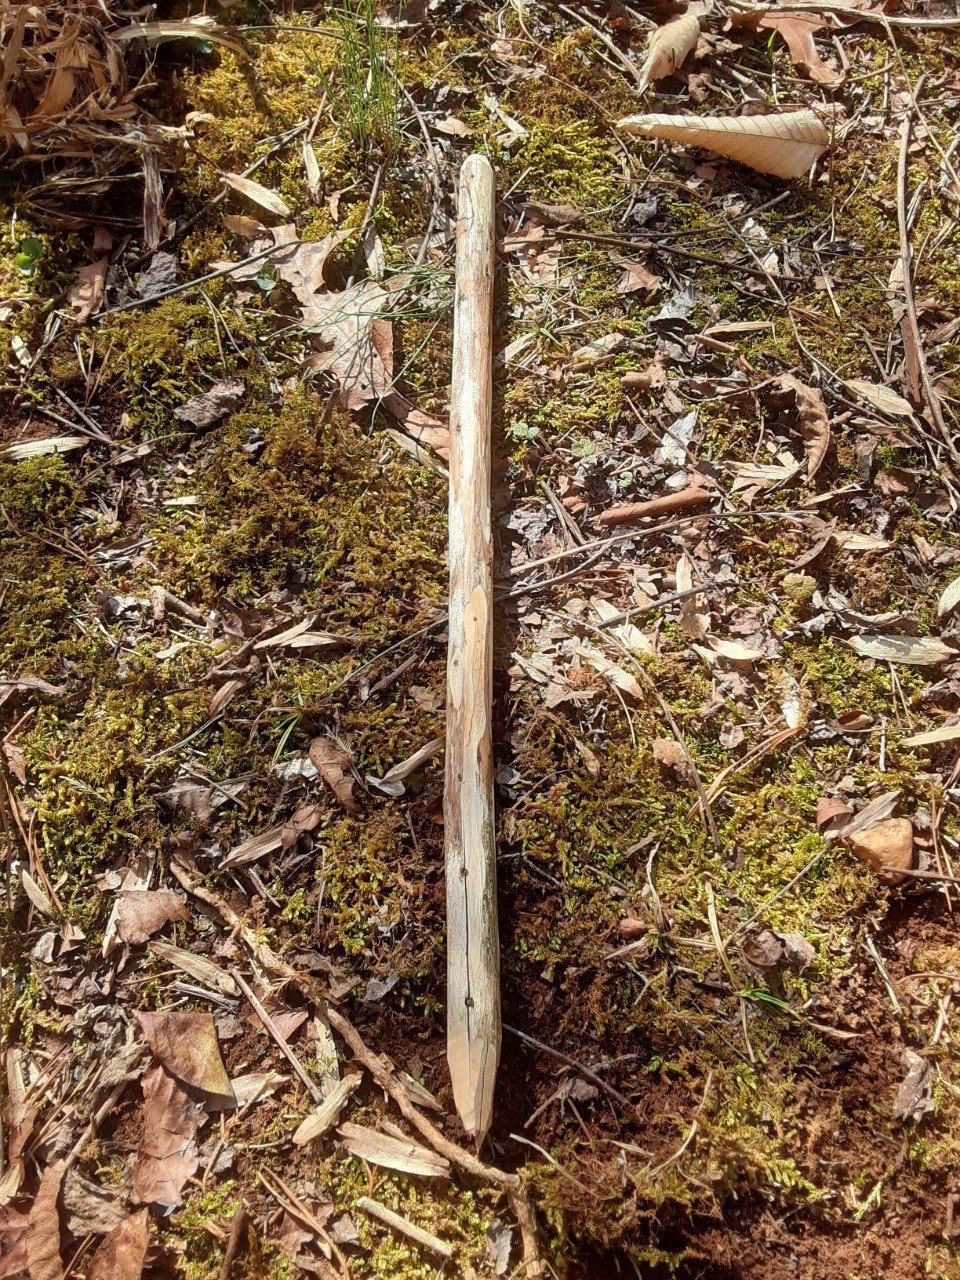
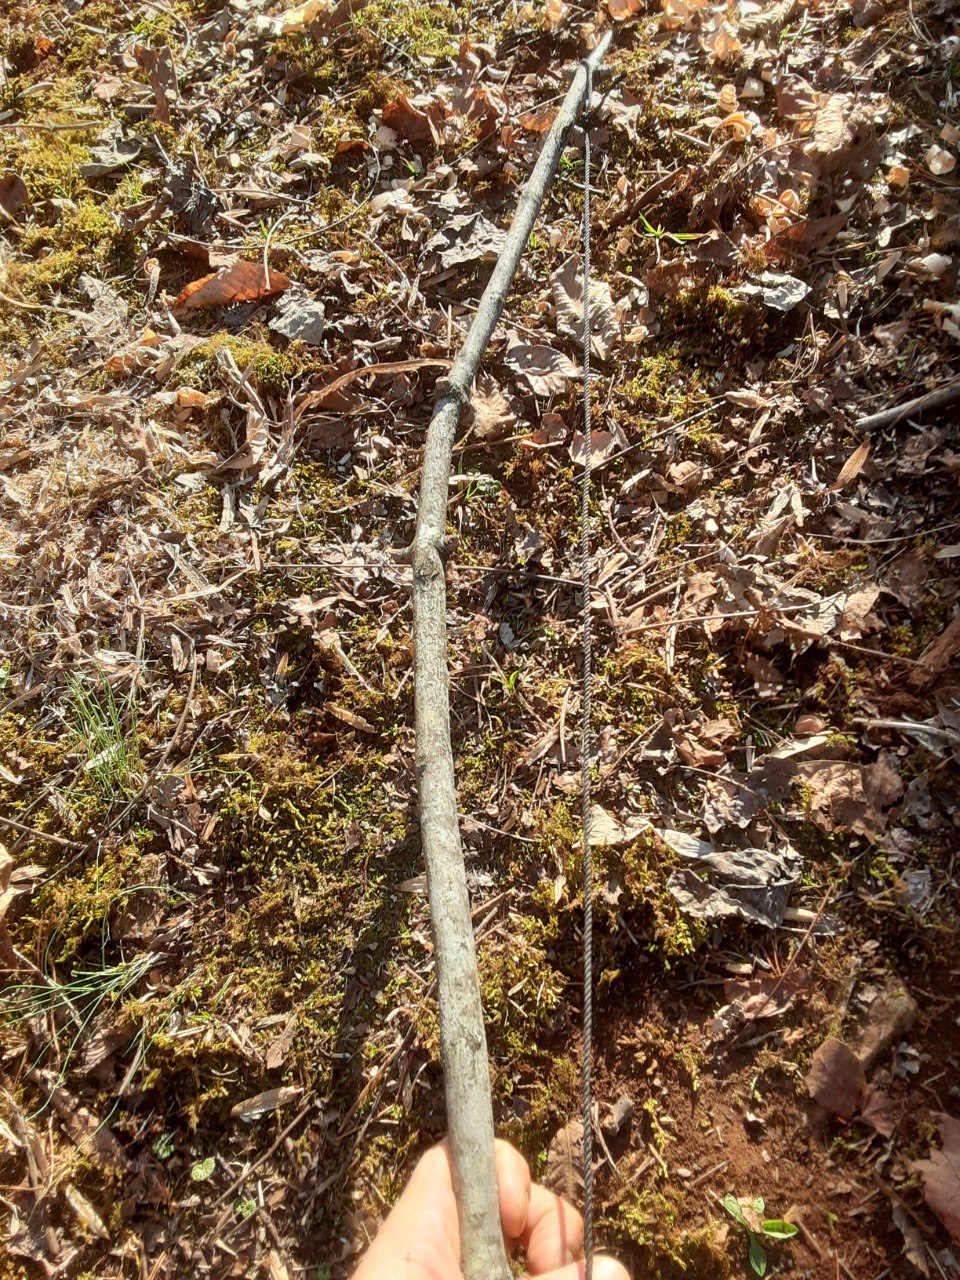
I find a straight piece of cedar about 1 inch in diameter. Carve the piece to be as straight
as possible if needed. Make the ends like a pencil...One end like the sharpened lead side and the other like a
rounded eraser. The "eraser" side goes into the fireboard. The "lead" side goes into the bearing block. Don't
skimp on any of these steps. Every component needs to be done the best you can to make this work smoothly.
Tolerance stacking will result in no ember. Take your time.
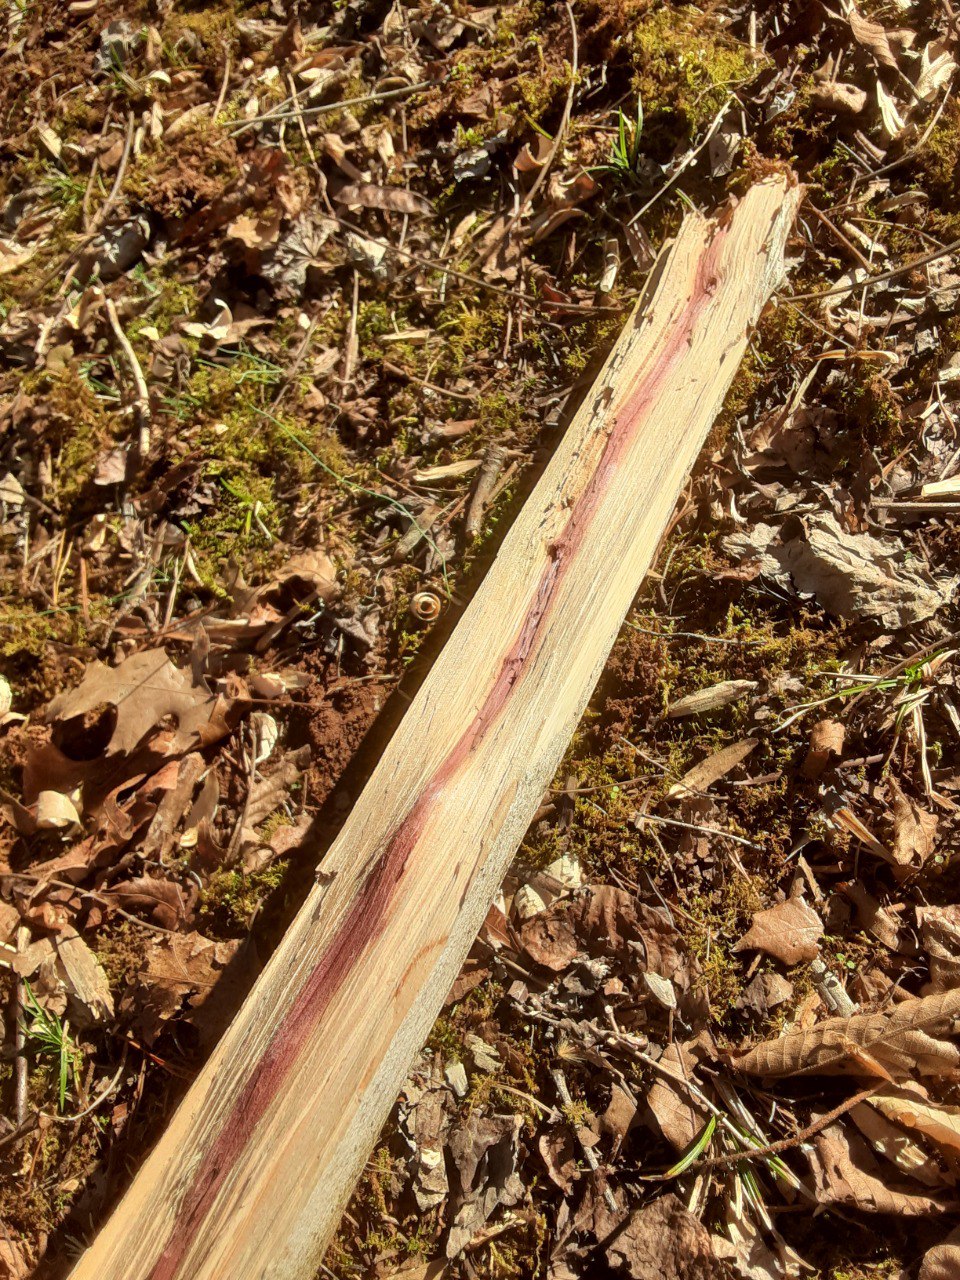
Next is the fireboard. I found a piece of cedar that was on the ground but a long portion was
elevated and not touching the ground. It was dry and had a natural split in it. Using two trees and levering it
between them I snapped off a small section. Then I split the wood with its natural crack. Then I carved the
rounded side to make it have three relatively flat sides.
Next I find any stick with a slight bow in it and I tie a string to it. Yes I carry cordage
Usually wrapped around my knife sheath, often in my pocket, and in a worst case scenario I have shoestrings.
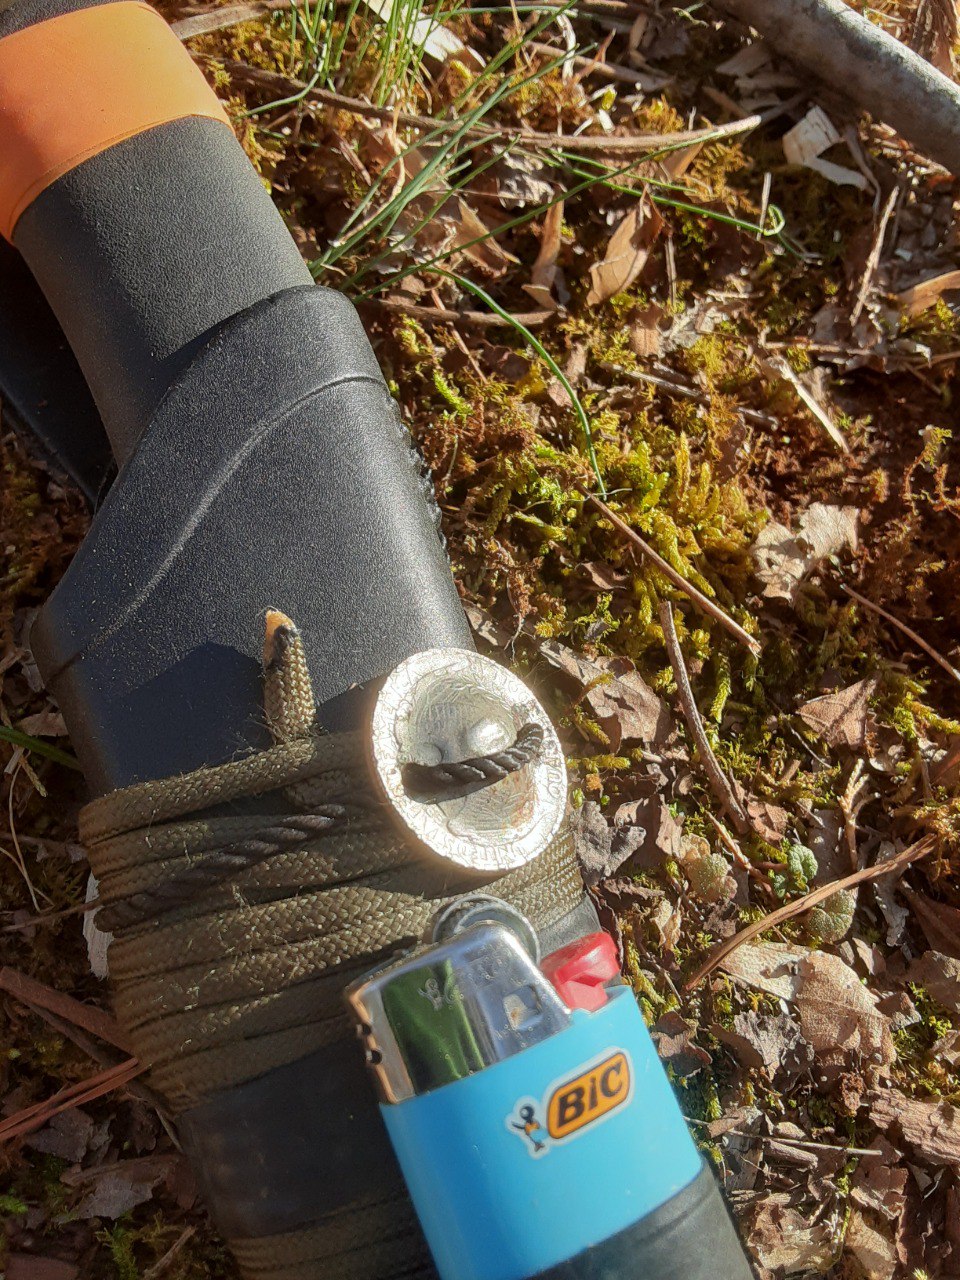
Next is the "bearing block." This is the component that can make or break your success. You
can make a bearing block from natural materials. Fatwood is the best for me and is usually easy to find. Or you
can use a green hardwood. But I carry this indented quarter on my knife so I'm going to use it. There is another
way to use a regular flat coin too, but I won't go into that here.
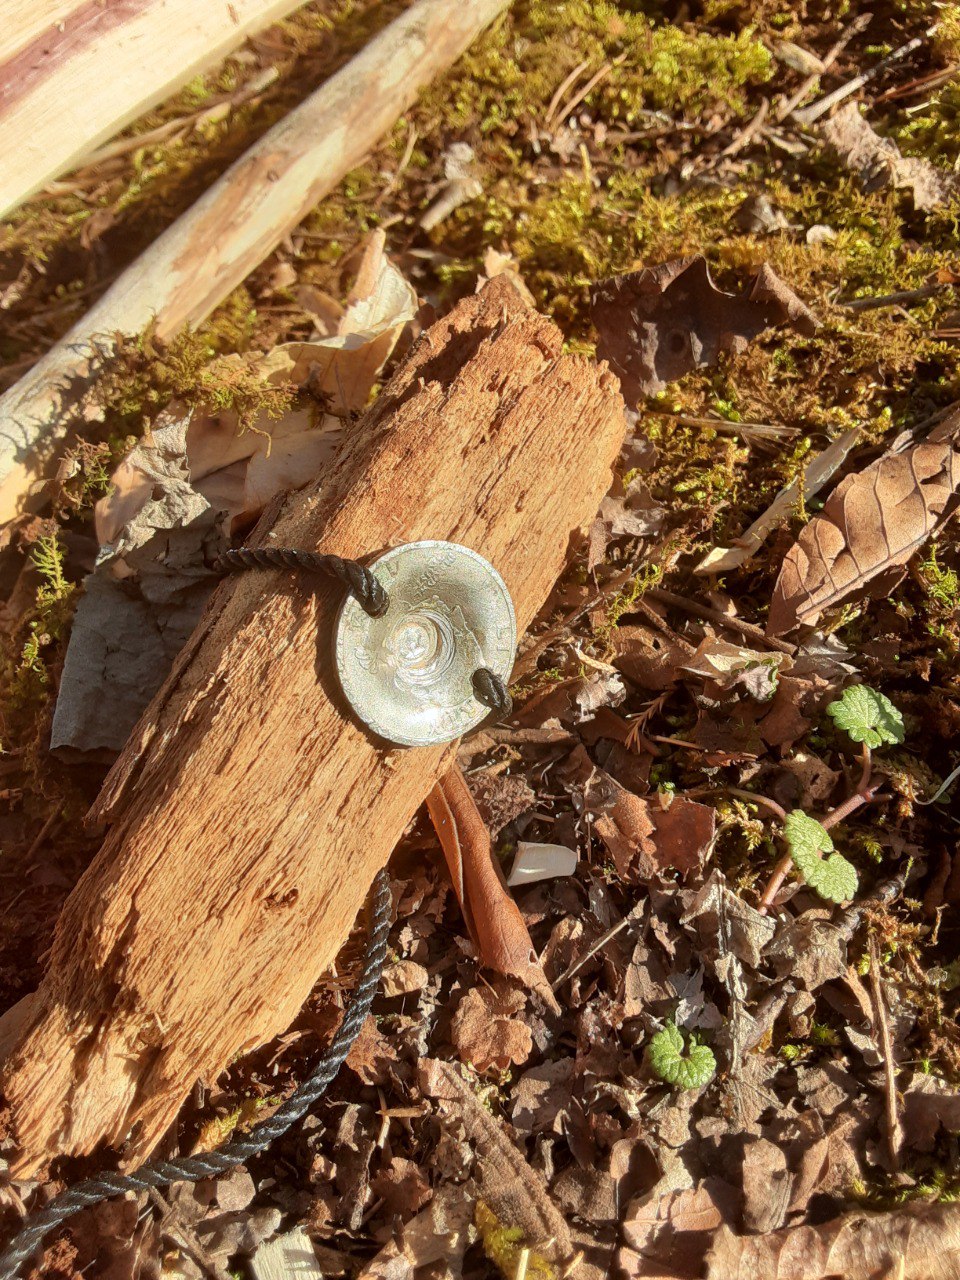
I found this chunk of wood on the ground and secured the coin to it. The "lead" end of our
pencil shaped drill will go into the coin and spin freely against the metal.
Next, I carve a very small divot with my knife and then do an initial "burn in" with the bow
drill.

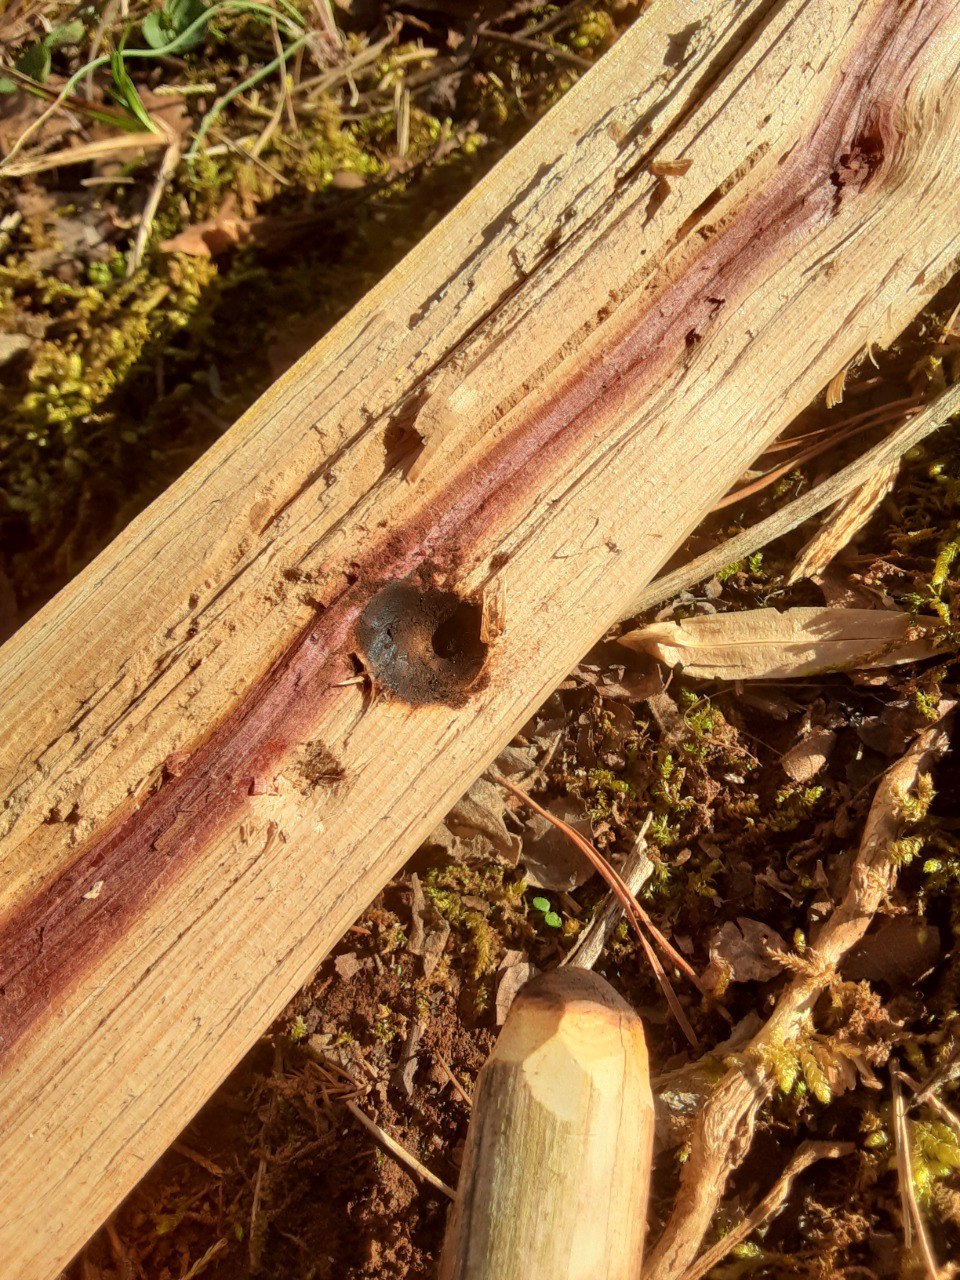
After that I carve a notch into the divot. Don't go too far. The center is too far. Don't
make the notch too narrow either. It is better to be too wide than too narrow. Coal dust will fill this hole and
then form an ember from the heat of friction. A small leaf is placed under the notch to catch the ember. i will
then dump the glowing ember from the leaf to the bird's nest.
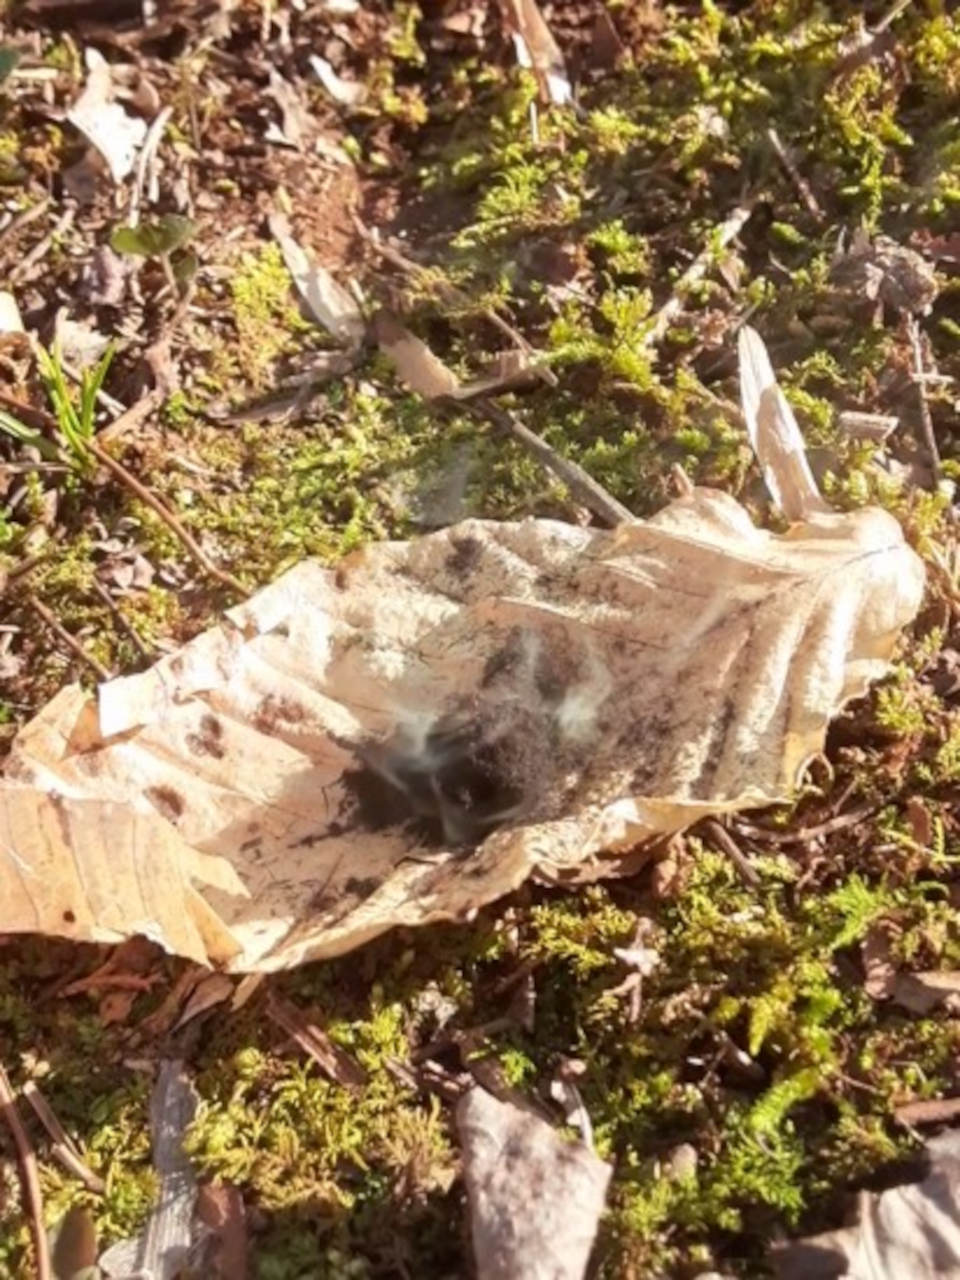
After the ember is made I remove the fireboard and the ember is left smoking on the leaf.
There is no need to rush. Sorry I couldn't show video of the bowdrill process, but that is not what this post is
about.
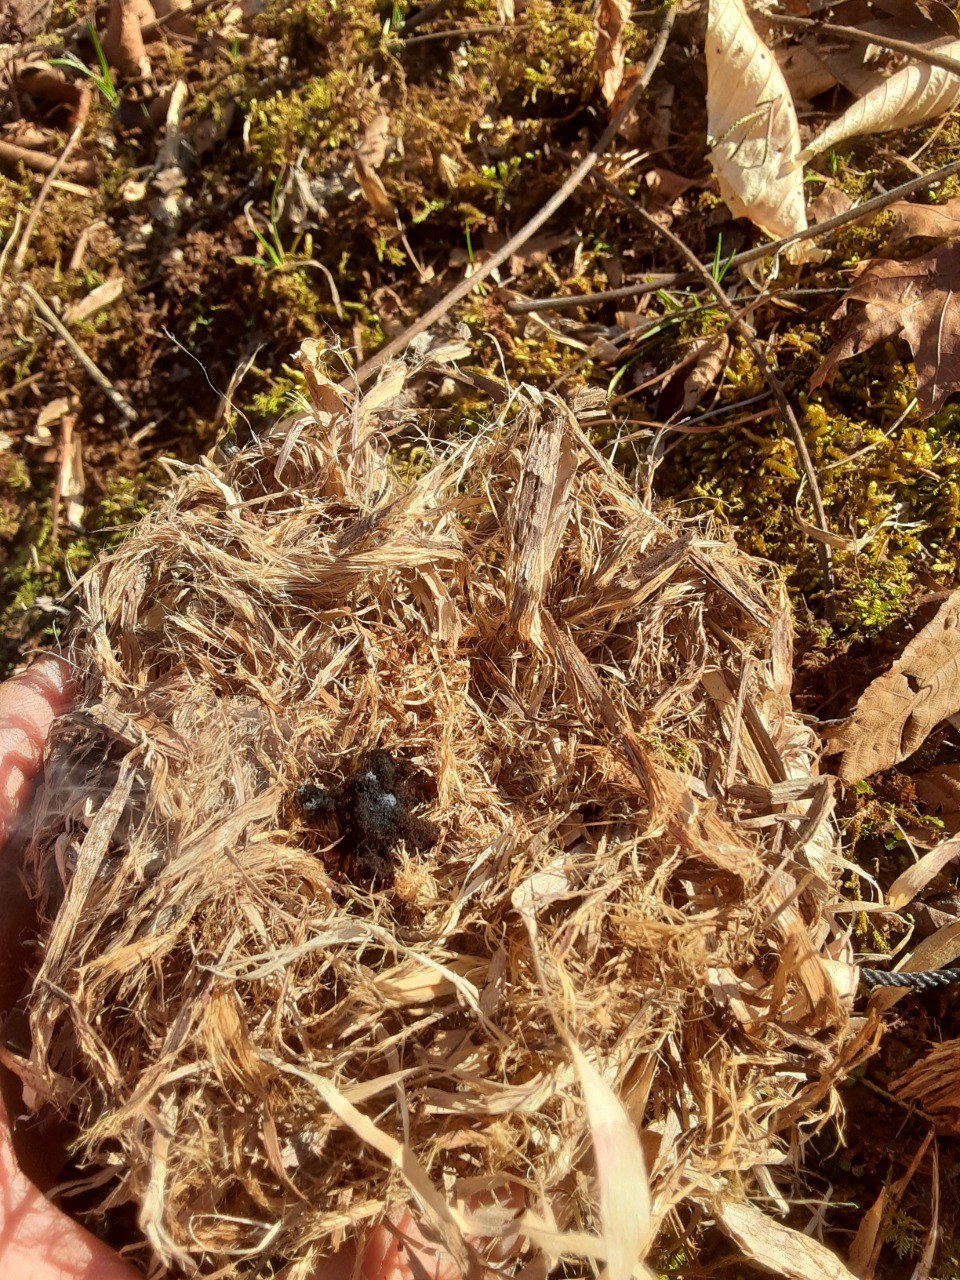
Next I put the smoking ember into the bird's nest.
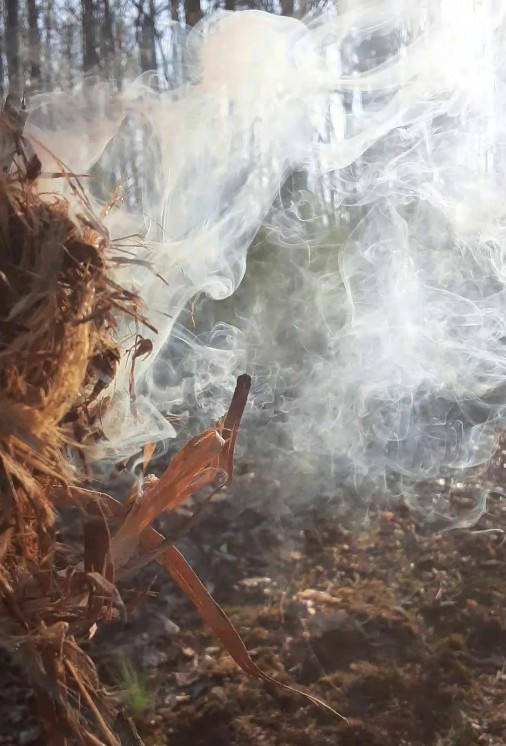
Then I fold the bundle around the ember and blow it into flame. Sorry the video is not
better, but it was difficult to hold the camera and see the screen while blowing the tinder bundle into flame.
So there is friction fire. It takes a good bit of time to find the materials and build everything properly. With
practice though you can have confidence that you can start a fire with nothing but a knife, your shoelace, and
some knowledge.